Upload Multiple Pictures into SharePoint Folder via PowerApps
Hello everyone !! Hope you all are enjoying our blogs. Visit this link in order to see our listed blogs. Today we will see how to Upload Multiple Pictures into SharePoint Folder via PowerApps. We will use gallery control to add multiple pictures taken through camera control. We will upload those picture in SharePoint library folder by a triggered using button click.
Agenda for this blog
- Create PowerApps Screen and Formulas for controls
- MS Flow to create folder and upload pictures into it
Create PowerApps Screen and Formulas for controls
We will add a screen under the screens tab of our application. Screen shot of my screen is below.
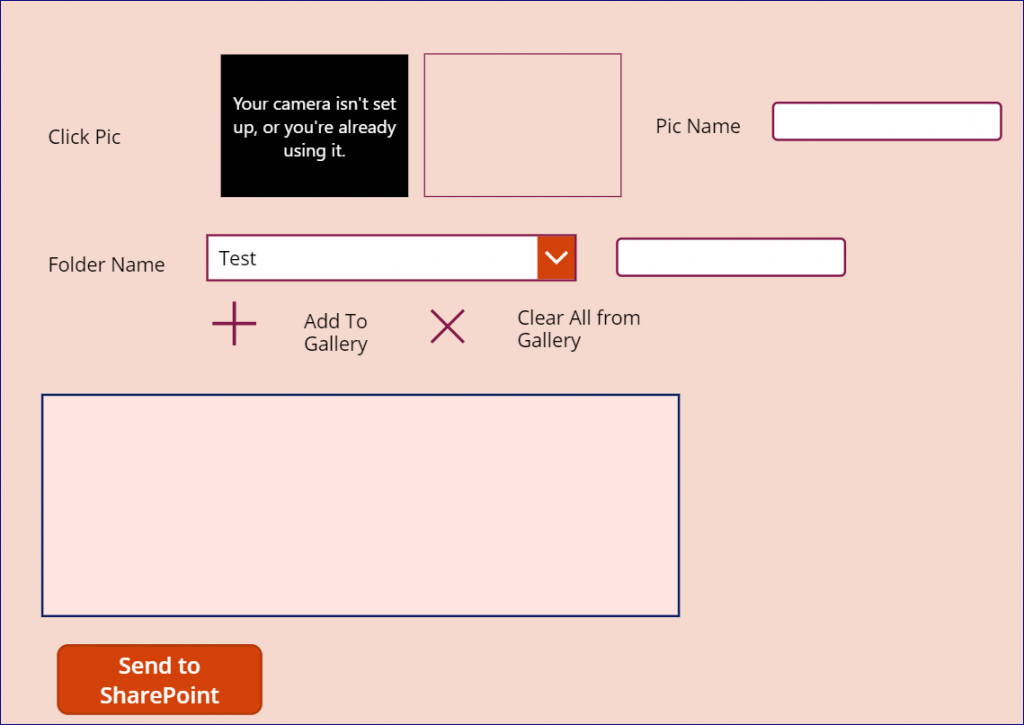
We will discuss each control in details below:

In above screen shot, we are using Camera, Image, Label and TextInput controls.
Each control is explained below.
Label1 > Text > “Click Pic“
Image1 > Image > Camera1.Photo
Label2  > Text > Pic Name
TextInput1 > "To key in picture name"

 Label3 > Text > “Choose Folder Name or Key in New:“
Dropdown1 > Items > Filter([@Documents],IsFolder=true).Name
Here  [@Documents] is a data connection to my sharepoint library. Basically I am populating all the folders to this drop down
TextInput2 > Default > Dropdown1.SelectedText.Value. We can also use new folder name as well.
Add To Gallery Icon > OnSelect > Collect(PictureColl,{Picture:Image1, Name:TextInput1.Text})
Clear All From Gallery Icon > OnSelect > Clear(PictureColl)
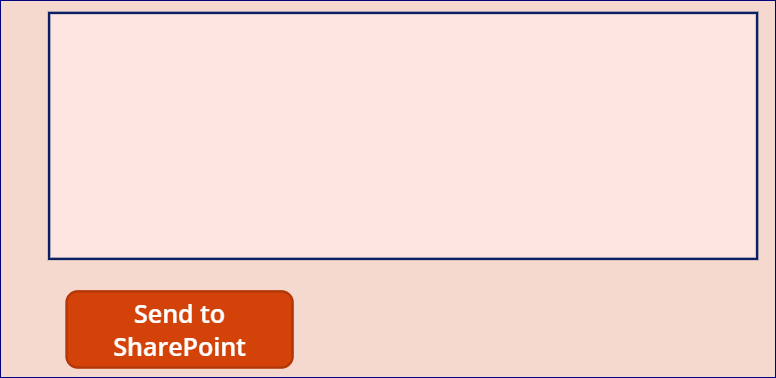
Gallery1 > items >  PictureColl
Image2 (Control in side Gallery1) > Image > ThisItem.Picture
Label10 (Label holding picture’s name)> Text > ThisItem.Name&".jpeg"
Button (Send to SharePoint) > OnSelect > ForAll(Gallery1.AllItems,Filetosharepoint.Run(Label10.Text,Image2.Image,TextInput2.Text,TextInput2.Text,TextInput2.Text))

Here,  Filetosharepoint is a flow which will create new folder if it doesn't exists. And upload all the items from gallery to that SharePoint Folder.
MS Flow to create folder and upload pictures into it
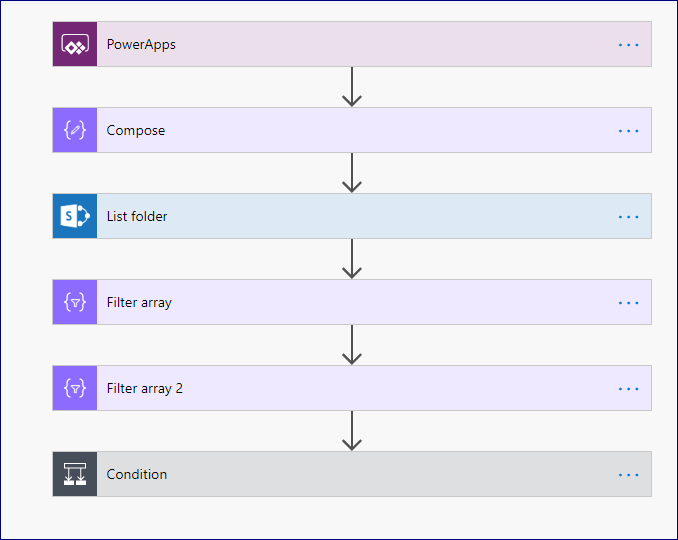
Now we will create the MS flow to create a folder and upload the pictures into it. If you don’t know how to do please visit link. Below are the steps involved in this Flow.
1) Construct an object
2) List All the folders inside SharePoint library
3) Filter Lists array on the basis of whether is folder or not
4) Again filter the array on the basis of folder name
5) If condition to check folder. In Case of yes create a folder and then item into it. If not, then first create a folder and then item inside it.
We will discuss all the above steps in details below.
Construct an object

- Add compose action from data operations list.
- Inside inputs pass dataUriToBinary using Expression tab.
- Formula will be like this datauritobinary(triggerBody()[‘CreatefileFileContent’]).
- Here CreatefileFileContent will be provided in powerapps.
List All the folders inside SharePoint library
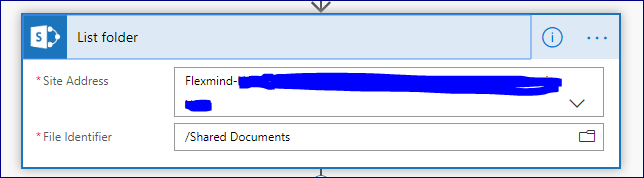
- Add List folder action from SharePoint list.
- Provide Site Address and File Identifier values.
Filter Lists array on the basis of whether is folder or not
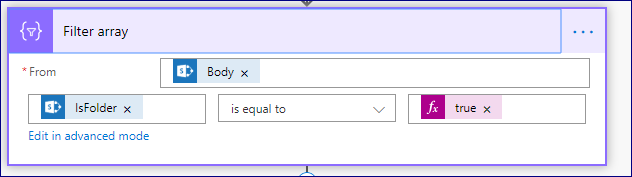
- Add Filter array action from data operations list.
- From is equal to Body of the list folder action
- Then condition will be IsFolder is equal to true.
Again filter the array on the basis of folder name
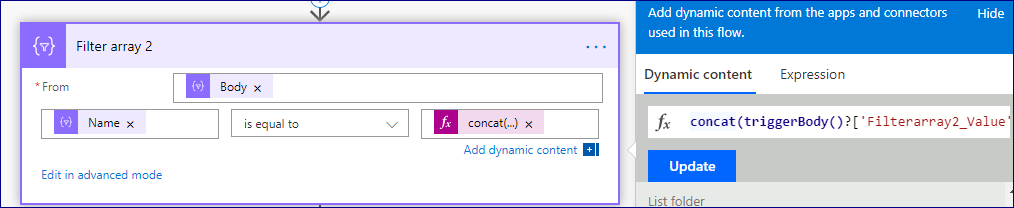
- Again Add Filter array 2 action from data operations list.
- From is equal to Body of the Filter array action
- Then condition will be Name (Body value from Filter array action )is equal to concat(triggerBody()?[‘Filterarray2_Value’]).
- Here Filterarray2_Value will come from powerapps.
Condition to check folder existence
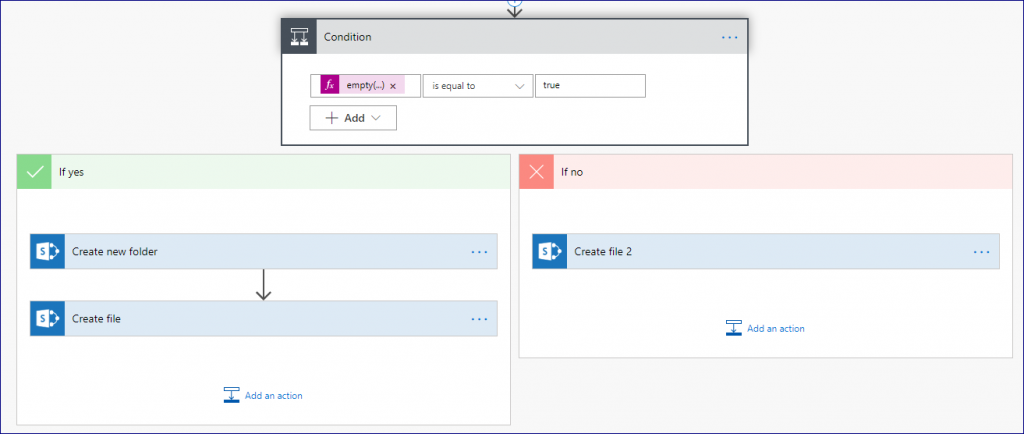
- Add if condition from action gallery
- If empty ( Body value from Filter array 2 action ) is true; then create new folder and file into that
- If empty ( Body value from Filter array 2 action ) is false; then create file
Create folder
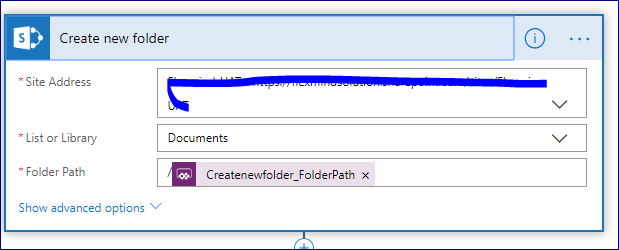
- Provide Site Address and Library name
- Folder path will be coming from powerapps
Create new File
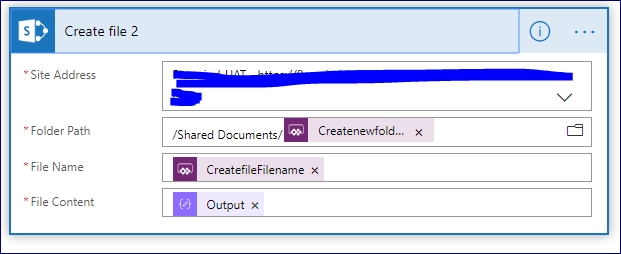
- Provide desired site address and folder path
- File name value will come from powerapps
- File content will be the Output value of Compose
After performing all these steps you are ready to test your application. 🙂
Hope you all will like this post, if so do please subscribe our site and also share this post. One important announcement we are going to start a PowerApps and Flow virtual lead 24 hrs training course from 5th October. If you are interested go through our site and register.
Thanks for sharing this. I have created a similar app but have been frustrated by the fixed timeout in sharepoint which has broken my flow when the photos are too large or the network connection is not good. Have you experienced this and overcome the problem?